Number Management
The Number Management module provides organisations with a simple to use interface in order to manage their telephone numbers with Microsoft Teams.
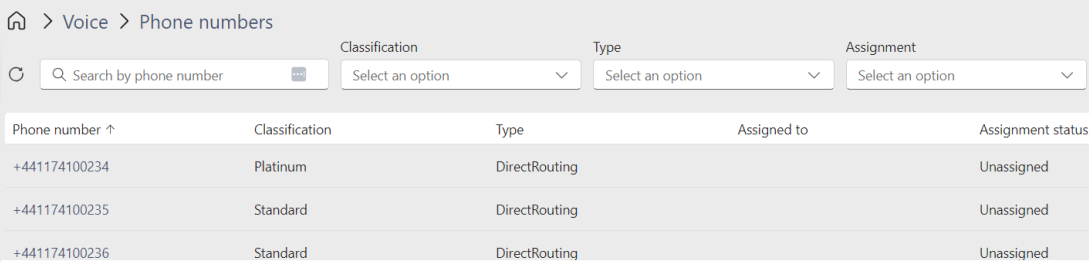
Phone Numbers
The Phone Numbers section allows for the editing of specific numbers within the organisation.
Editing a Number
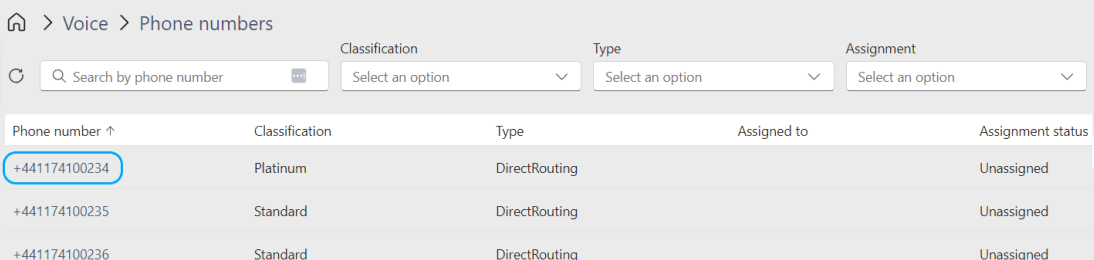
Step 1 : Select the number
Select the number desired from the number list using filters or search from the toolbar.
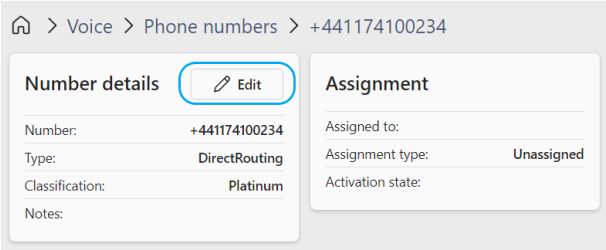
Step 2 : Edit the number
Click Edit on the selected number
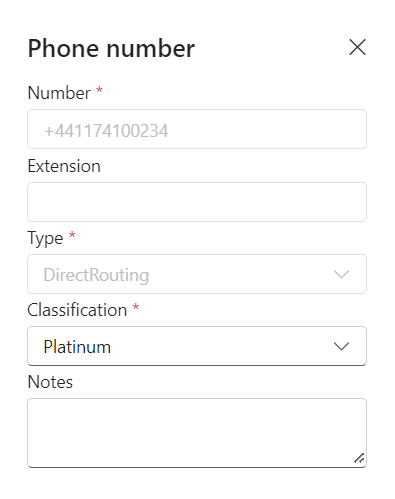
Step 3 : Complete the changes
On the form that opens, update the number with the required changes and click Save.
-
Number: Number selected to edit
-
Extension: The extension number for the user
-
Type: Type of number within the system
-
Classification: Used to help organise numbers based upon their value/status. For example an easily memorable number may be given a Platinum classification. Numbers will be automatically assigned a classification based on a ruleset within Hub - this can be amended manually after the initial synchronisation has completed.
-
Notes: Free text field for additional information
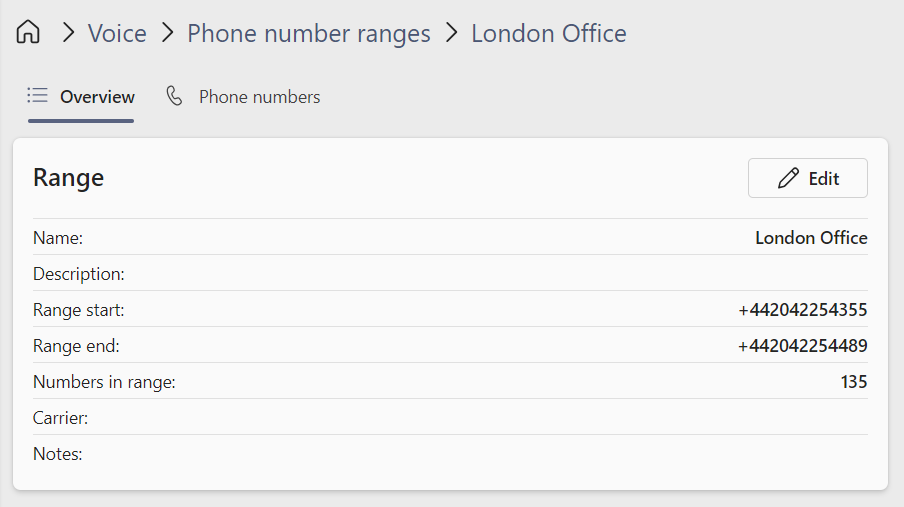
Phone Number Ranges
Your organisational number ranges are centrally managed in the number ranges section of Symity Hub. When a synchronisation is triggered, numbers and ranges for Calling Plans & Operator Connect models will be populated automatically. If a customer has Direct Routing numbers, these will need to be manually added.
Supported Number Types
- Calling Plans
- Operator Connect
- Direct Routing
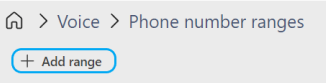
Adding a Range
Step 1 : Add a Range
Click on the Add range button to begin the process.
Step 2 : Enter Range Information
-
Name: Provide a meaningful name for the range
-
Description: Further information on the range
-
Range Start: Enter the first number in the range
-
Numbers in range: Enter the number of consecutive numbers in the range
-
Range End: Automatically calculated from the Range Start and Number in range fields
-
Carrier: If this can be detected the carrier name will be automatically populated
-
Notes: Free text field for additional information
Step 3 : Save the Range
Click Save to commit the range and the system will automatically populate the new range across the system.
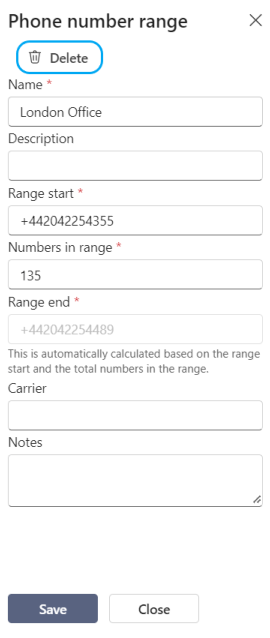
Deleting a Range
Step 1 : Edit the Range
Select a range to delete and click Edit.
Step 2 : Delete the Range
Click Delete to remove the range from Hub. This will delete the number range from Hub however will not impact assigned numbers or the user itself. When the range is deleted, Hub will be unaware of the full amount of numbers which are available at the carrier so will be unable to manage unassigned numbers until the range is re-added.
Users
The Users section is where information specific to an individual user is displayed and actions such as phone number and policy assignment can be performed.
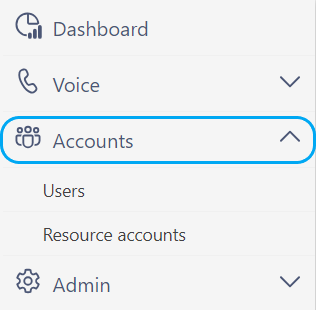
Supported Account Types:
- User Accounts
- Rescource Accounts
- Meeting Room Accounts
- Common Area Phones
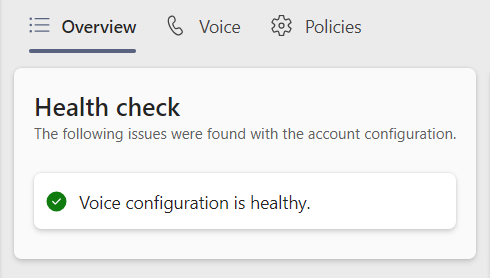
Healthchecks
When accessing a record, the system performs a healthcheck against the user to ensure that no common misconfigurations exist. These include issues such as users having a number assigned but do not have the correct licence available.
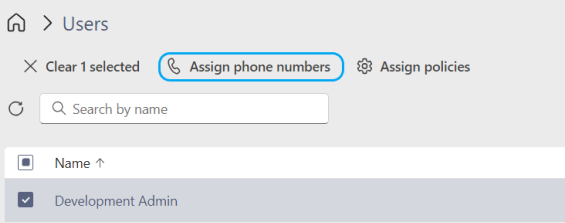
Assigning a Number to a User
- Select the user from the Users list and click Assign phone numbers
- Click Edit

- Using the filters or search, find the phone number to assign then click Assign
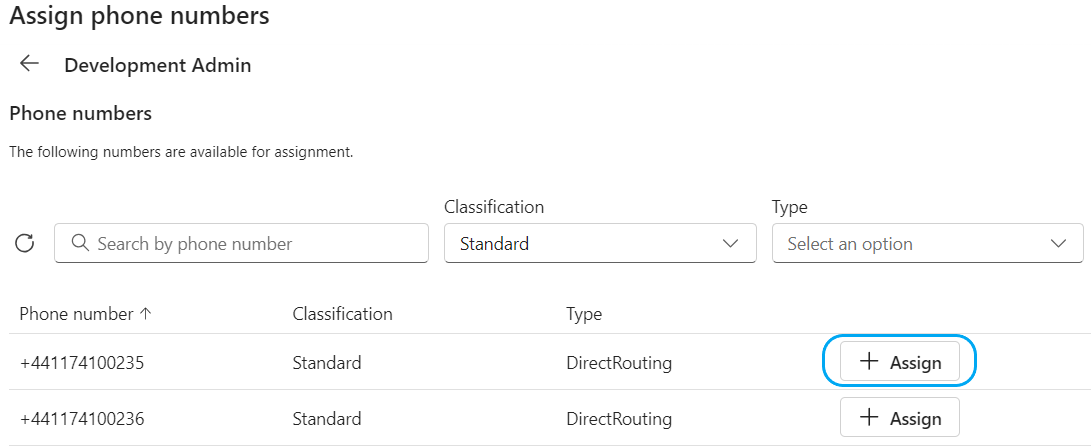
- Click Save
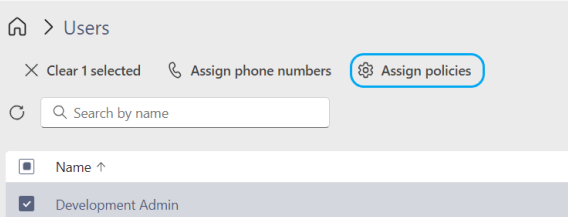
Assigning a Policy to a User
- Select the user from the Users list and click Assign policies
-
Select the from the policy areas shown and assign the appropriate polices
-
Click Save